
|
Happy halloween everybody! I have put together a fun little blog post for halloween! It's not too long but I hope you enjoy it! BeautySomething really fun to do for halloween is to paint your nails in cool designs. I've done some nail polish tutorials for you, so I hope you like it! Just a little side note: I am definitely not a professional when it comes to applying nail polish. I do it because I love it! Orange with black sparkly accent nail 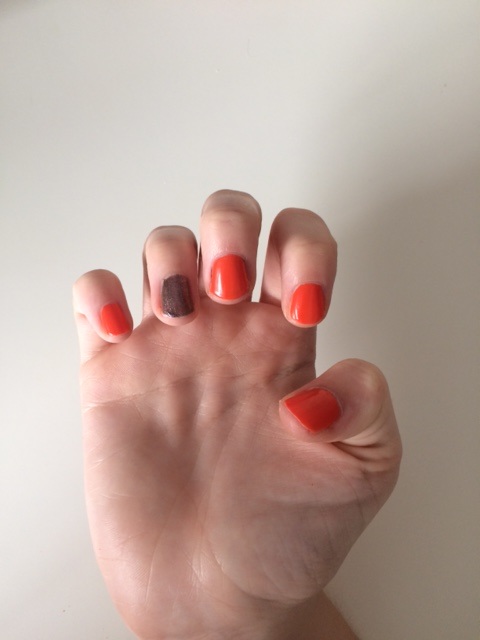 You will need: Orange nail polish I used Ulta3 in Tangelo. 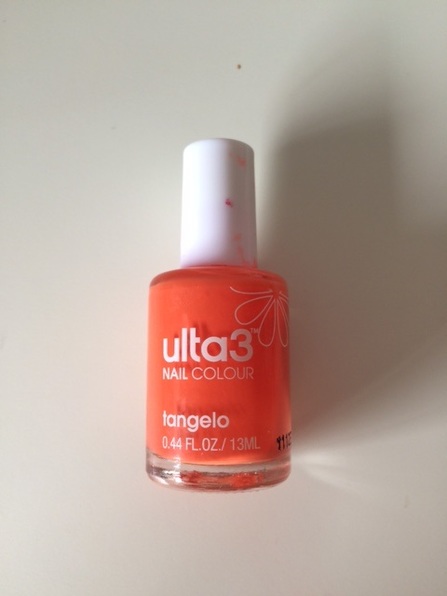 Black with sparkles I used OPI Lucerne-tainly Look Marvellous 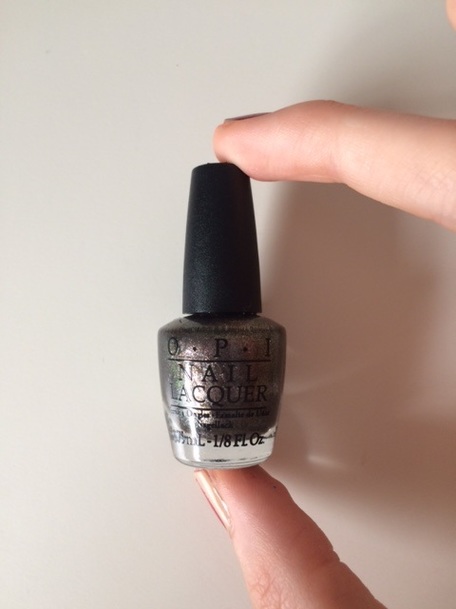 Find it: 1. Apply a clear base coat (not nessacary, but is a nice touch) 2. Paint all nails excpet for the ring finger with the orange. 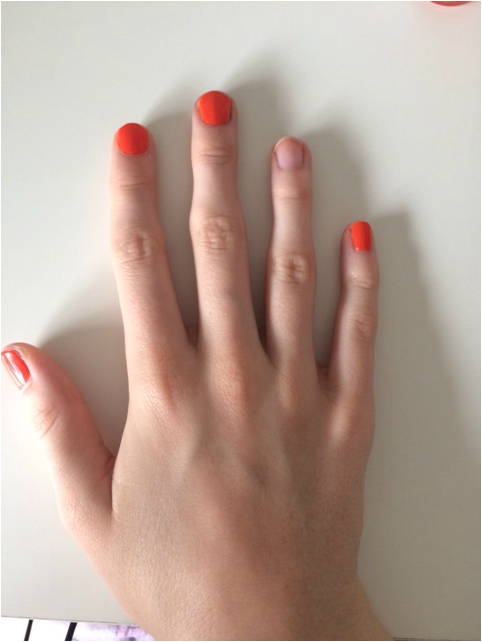 3. Paint the ring finger with the black polish. 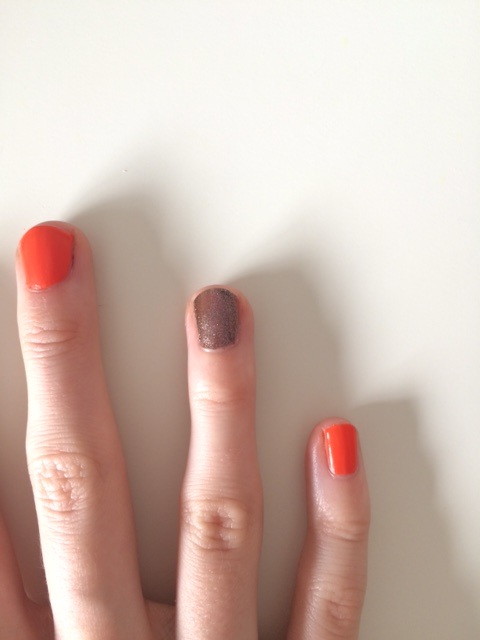 And you are done! This one is super simple and quick, so perfect for a last minute mani! 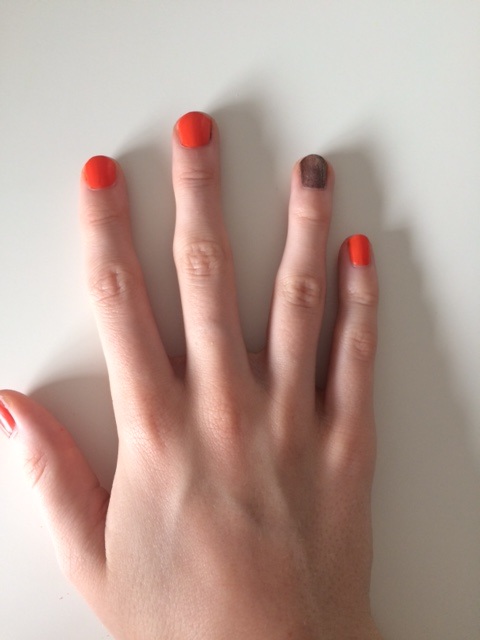 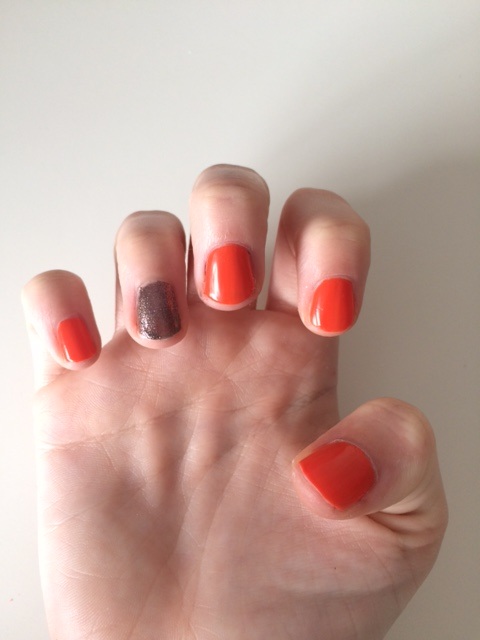 Bloody Fingerprints  You will need: Any light colour for the base I used Sally Hansen Complete Salon Manicure in colour 215 Shore Enough 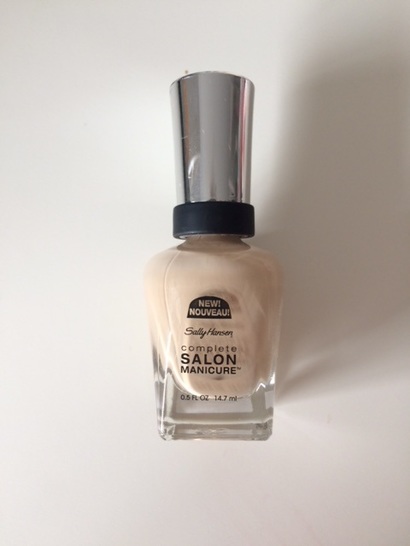 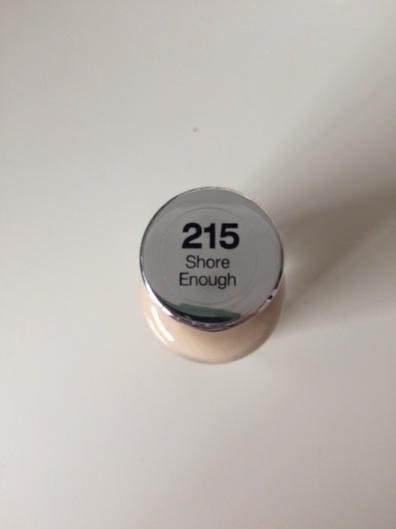 Find it: A red nail polish I used Bloom Nail Polish in Millie 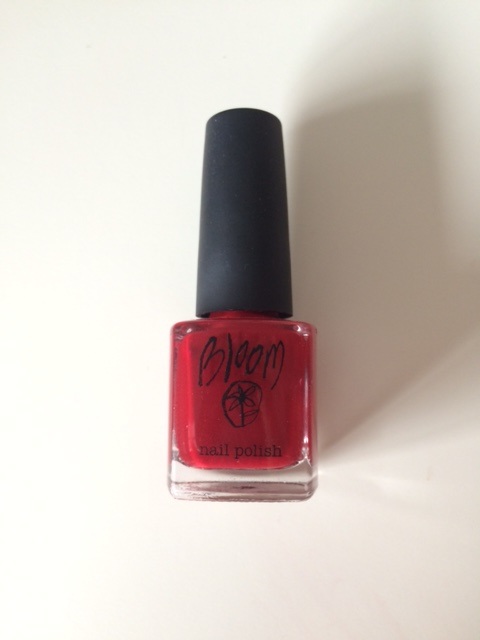  Find it: 1. Again, put on a base coat if you would like 2. Paint the nails with any light colour of your choice (I used nude, but I think white would look pretty cool too!) 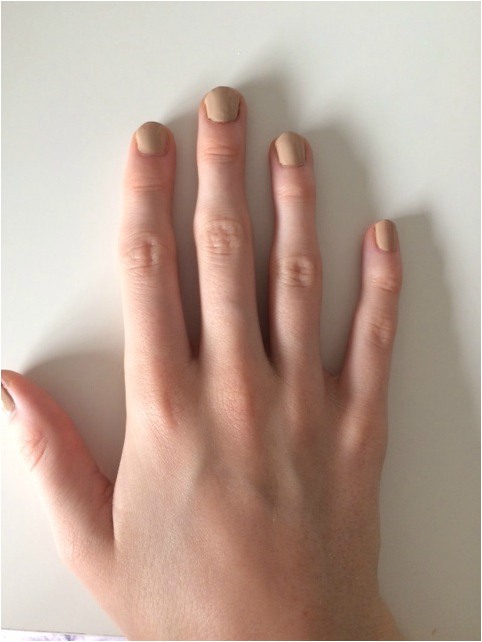 3. Put some red nail polish on a cardboard or hard plastic surface 4. Once the undercoat is dry, press one finger on the other hand into the red nail polish and press that finger onto a painted nail. Continue until all nails are printed.  5. You can do a topcoat to make it last longer if you wish. FashionOne thing I always leave till the last minute is a Halloween costume! To help to anyone like me, I've put together some really simple costumes that are still cool! Most things you could have in your wardrobe, and the other items can be easily picked up at a local store! Bachalorette You will need: - a dress - heels - a rose Find: Kylie Jenner You will need: - A slim fitting dress - A phone - Nude lipstick Find: Little Red Riding Hood You will need: - white dress - red cape - basket Find: Pop-art Girl You will need: - black top - swing skirt - face paint Find: LifestyleI've taken inspiration from a blog and a Pinterest post for these two delicious ideas! I have put my own twists on them but still definitely check out the original blogs, they are amazing! Pumpkin Patch Dirt Cups Inspiration: http://paintbrushesandpopsicles.com/pumpkin-patch-dirt-cups/ 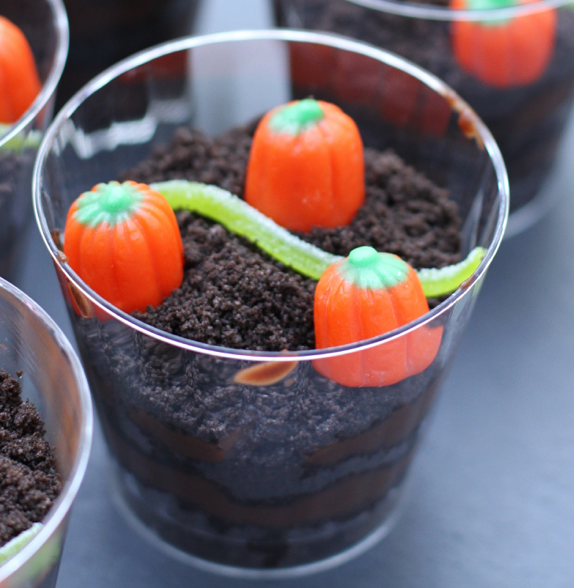 You will need: - Clear plastic cups - Pack of oreos or chocolate biscuits - Pumpkin lollies or any orange lollies or chocolates - Chocolate pudding, custard or mousse - Green sour straws Method: 1. If needed, make the pudding by following instructions on the box 2. Crush the oreos/buscuits 3. Layer the biscuits and pudding/custard/mousse until the cup is full (make sure the biscuits are the top layer) 4. Put a sour strap on top and place the pumpkin/orange lollies along the side of the "vine." 5. Dig in! Brain Biscuit 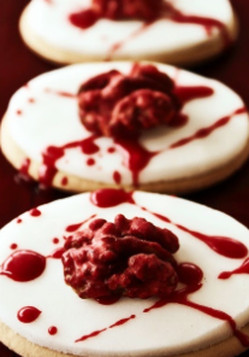 You will need:
For biscuits: - 175g flour - 50g custard powder - 50g icing sugar - Pinch of salt - 75g softened butter - 75g softened margarine - 2mL vanilla essence For icing and topping: - 4 1/2 cups powdered sugar - 1 cup butter - 7 tablespoons of milk - 2 teaspoon vanilla extract - 1 walnut per cookie - red food colouring Method: 1. Set oven to 180 (celcius) 2. Place flour, custard powder, icing sugar and salt in a sifter and sift into a large bowl. 3. Rub in butter and margarine with your fingertips and work mixture together until it is a smooth dough. 4. Work in essence. 5. Cut dough into shapes by sprinkling flour on a clean working surface, rolling out the dough with a rolling pin and use biscuit cutters. 6. Arrange the biscuits apart on a baking tray greased with a little margarine or butter. 7. Bake for about 15 minutes or until golden brown. 8. While the biscuits are in the oven, make the icing by creaming the powdered sugar and butter until smooth. 9. Gradually mix in the milk and vanilla until smooth and stiff. 10. When biscuits are cooked and cool, smooth 3/4 of the prepared icing on top with a knife. 11. Using the last quarter of the icing, put in a little bit of red food colouring. 12. Dip the walnuts in the red icing and place the walnuts on top of the biscuit. 13. Put some icing on a spoon and drizzle and splatter on top of biscuit. And that is all for this blog post! I have some really exciting stuff coming up in the upcoming blog posts so I hope you all will enjoy that! Thanks for reading, I hope you all have a Happy Halloween! xxxx Emily
8 Comments
|
Emily18. Australian. Lover of good food, lipstick and sparkly things. Professional burger eater, coffee drinker and online shopper. Categories
All
|
